How I created my still-life image of a faded rose
There are plenty of photos and images on the Internet and some of their authors generously share the process of creating them, the how-to manual for getting the results they achieved. I love those “recipes” and I’m always eager to have a look behind the scene. It’s enriching in so many ways. The basic processing may be quite similar but when it comes to feelings and reasoning, it becomes personal and inspiring. I’d like to add my contribution to that shared knowledge by showing you the process of creating one of my recent still-life images.
The reason why this image came into existence was the fading beauty of that rose. I bought a bouquet of 10 yellow roses in a supermarket to brighten my kitchen in these autumnal darkening days. I didn’t expect the roses to last long but surprisingly they were enriching my kitchen with their charm for whole 10 days. Then they faded quickly and I felt like I wanted to have some memory of them. I took them into our barn and found some old wooden surface to place them on as I felt attracted by that combination of rough textured wood and gentle but fading flowers.
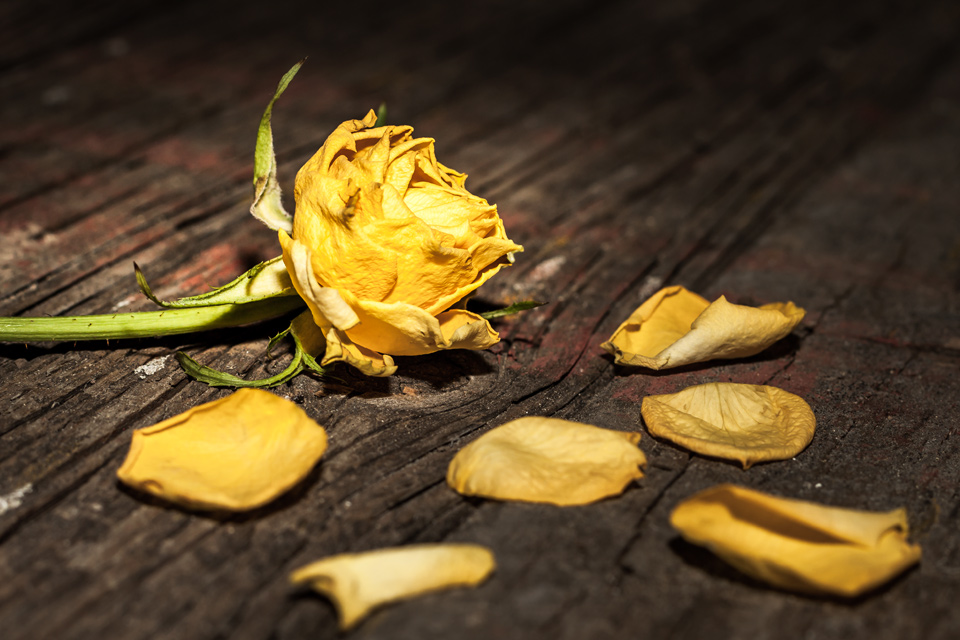
Here is the original photo, straight out of the camera. It was taken in raw format and I just exported it from Lightroom into jpeg format, without any processing:
Don’t forget that raw format produces much softer images than jpeg format and needs to be processed. If I had this photo in jpeg format straight out of the camera, it might look better but I would have less data for further processing.
Photo equipment I used: Canon EOS 500D camera; Canon EF50 mm f/1.4 USM lens; Canon external flash with a movable head and optional diffusor
Camera settings for the photo: raw format, aperture mode, 1/60 sec at f/6,3, ISO 200, flash aiming directly at the scene with the diffusor on
The photo was taken inside the barn on late afternoon of a dull, grey day so I needed to use the flash to get enough light into the lens, using just tripod would have produced an extremely flat image. I highly recommend investing into an external flash. I don’t use the built-in flash any more, with the exception of desperately needing more light and not having that external flash at hand but my experience taught me that results are usually not acceptable so I do avoid using it.
Software I used: Adobe Lightroom 5 for processing the raw format, Adobe Photoshop Elements 11 for change of the size of the final image and possibly for adding a watermark (I know I can do this in Lightroom as well but there is more flexibility in PSE in this regard which I like)
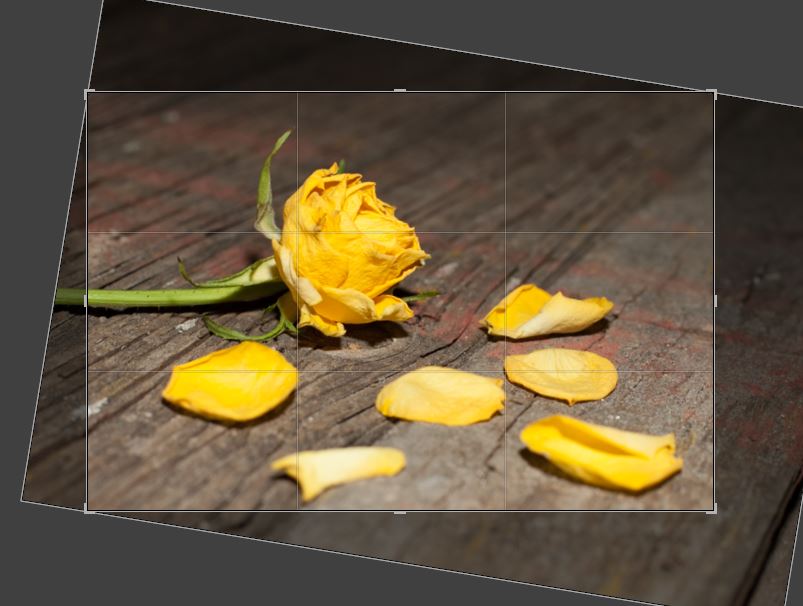
After importing a photo into Lightroom I always start by applying lens correction and then by cropping, if that’s necessary. In this case I cropped and turned the photo to improve its composition and detail.
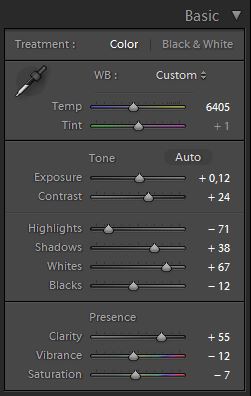
Then I adjusted basic tone settings such as white balance, exposure and contrast, highlights and shadows, whites and blacks, clarity, vibrance and saturation. I have to admit that I don’t particularly like the “Auto” option, I like to move the sliders myself, one by one, assessing the effect.
To add a bit more contrast, I adjusted very slightly the tone curve.
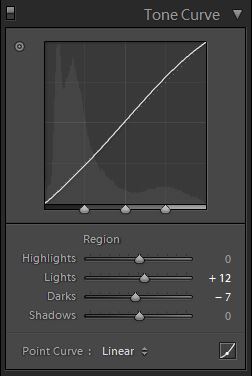
You may ask why I was adjusting the tone curve when I already adjusted contrast, lights and darks and could adjust them further. Well, I combine these two options sometime, the basic settings and curve, because visually it makes sense. First I see the basic image and then the curve enhances its value.
I added sharpening (amount 55 with masking 57 to avoid noise in “flat” parts without much detail) and reduced noise (luminescence 30).
To bring attention to the rose, I added a radial filter encircling the whole rose including its stem, by means of which I increased contrast around the rose a bit more (+22) and decreased exposure (-1,15), clarity (-33) and saturation (-24). The right bottom corner was too bright and was overshadowing the rose a bit so I added a graduated filter there with wide transition and just exposure decrease (-0,69). Finally, by means of the adjustment brush I decreased exposure (-0,41) and saturation (-10) in the flower (not in the stem or the leaves) and added a very subtle overall vignetting (just -2).
After all those changes I needed to get back to the basic settings and adjust them a bit, here are the final values:
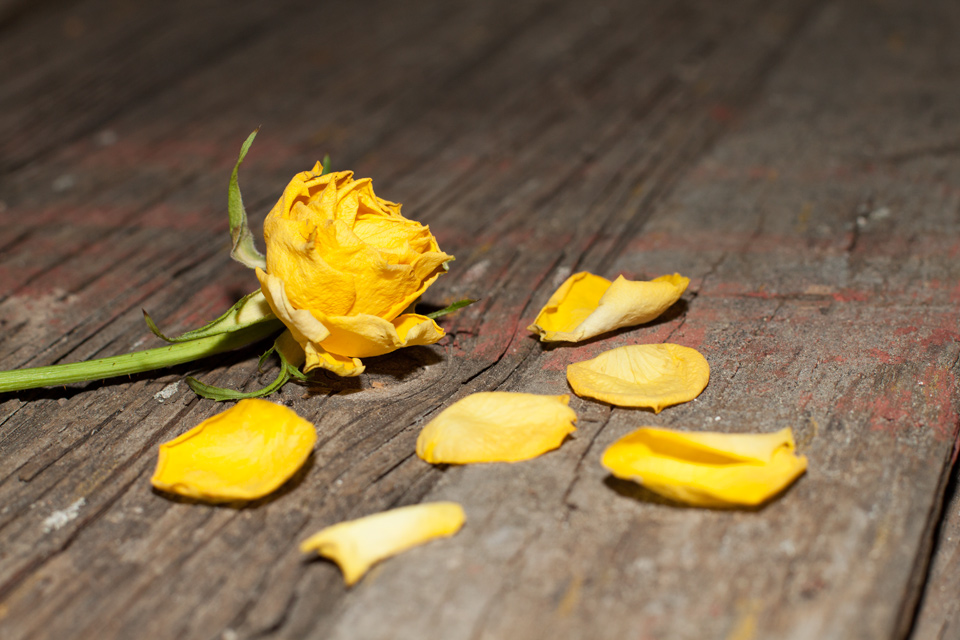
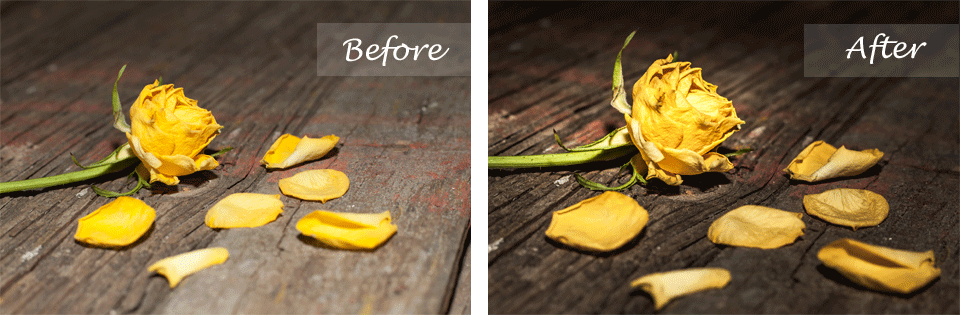
Below you can see the before and after versions compared, where I started and where I finished. I tried to add those feelings of the moment to the capture:
There are many ways how to proceed and I don’t insist on this one being the best or right one. In the described way I was discovering the possibilities of that particular photo and was fulfilling my vision. I hope that watching the process and possibly comparing it with yours felt interesting and inspiring.