Pleasures and pains of editing photographs
The process of editing photographs can be pleasant and fulfilling but it can also be confusing and even intimidating. At least that is my experience and I want to talk about it today. Not to make the reading too dry, I’ll add a few of my before/after images. The before images are unprocessed RAW versions just transferred to JPEGs.
Let’s make it clear from the beginning that for the purpose of this post, by editing I don’t mean adding textures, creating composites or making any major changes to the photograph’s contents (except for cropping and minor healing or cloning), just adjustment of light, saturation, contrast, white balance, etc.
My first digital photographs were in JPEG format and I edited them in Photoshop Elements. I generally just corrected the overall exposition, contrast and sharpness of the photos. Later I learned that if I “open shadows” i.e. add light to them, I will reduce the unwanted dark areas of the images and get nicer pictures.
Much later I found out that in this way I created many rather flat and noisy images because I didn’t know that shadows contain less data, hide noise and shift white balance to the blue tones. Also, I didn’t realise that by reducing the shadows I was changing the contrast. Besides, dark and shadow areas are often an important part of a photograph so reducing them significantly was not always a good idea.
Much later I also found out that when I replaced some of my originals with those edited versions, being convinced that I created much better images, I lost data and by any further adjustment I was losing more. I saw the mistakes I had made and could not go quite back. I would never ever replace an original by its edited version again.
JPEG images are compressed with loss of data and you need to take that into account in the editing process but the advantage of working with a JPEG image produced by your camera based on your settings is that you get a processed image that has a certain final look. Although that can be both an advantage and disadvantage, you can decide whether you like it as it is or want to process it further.
When you shoot in RAW, you get an image which is more or less flat and has to be processed further. You get much more data for your adjustments than in case of the JPEG image, especially when you aim at the right part of the histogram where the lights are, but you yourself has to decide from the very beginning on what combination of contrast, sharpness, clarity, etc. the image needs to be properly processed, which may be quite challenging.
When I started to shoot in RAW (where applicable) a few years ago, I first set my camera to give me both JPEG and RAW images to have some guidance on what the images should look like, but it was not helpful. The JPEG can help you but it can also utterly mislead you… so after a while I gave up on the duplicate JPEGs, they just complicated the whole process and gave me nothing in return.
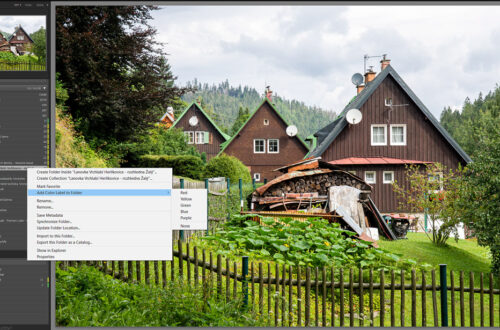
I bought the renowned Adobe software Lightroom to process the photos. To learn Lightroom as best as possible, I was reading and watching tutorials I found online and they gave me three types of information. Firstly they explained the buttons and sliders that Lightroom offers, secondly they taught me to take advantage of local adjustments and thirdly they showed me how other photographers edit their photographs.
Different people have different attitudes and when it comes to editing, it boils down to the same difference. Here are a few examples of what I read or heard:
“Lighten shadows up to 100%, darken highlights down to -100%, then bump up contrast significantly. Don‘t ask me why, I simply find this to be part of processing to get an interesting image.” x “Don‘t lighten shadows much, you would introduce noise and flatness into your image!”
“Use just the contrast slider, it works perfectly and adds nice colour saturation, you don‘t need to use the tone curve.” x “Never use the contrast slider, it makes colours too saturated. Adjust contrast solely with the tone curve.”
“Reduce noise reasonably but be careful not to compromise sharpness.” x “Never touch that noise slider, it deteriorates the sharpness and after all, there is nothing wrong about noise.”
“Bump up clarity to improve contrast and apparent sharpness, just be careful about faces and skin.” x “Never increase clarity, it makes photos ugly. You will destroy your images.”
One starts with setting the same camera profile first, another chooses the profile as needed and the others never use it.
Also, many times I saw how unbelievably far the demonstrator moved certain sliders and in the video it looked good but any time I attempted the same procedure in my photos, they looked awful.
As you can imagine, it all sounded confusing so eventually I figured out that I knew enough about what the software is capable of and it’s up to me to use it as best as I can in relation to my photographs, my vision. So I try.
Sometimes it’s not easy.
Sometimes I sit in front of my monitor and wonder what the image should look like. I grope in the dark, trying to perceive what it tells me, and then I start moving the sliders and solving the puzzle. Sometimes it’s a sprint, but other times a marathon.
Both overall and local adjustments can wonderfully finalise a photo, just to see them and make them right… So many decisions are to be made… And then there is the trap of adding several adjustments and creating an explosive combination which damages some areas with pixeling, noise or weirdly coloured spots… which is an issue not only with JPEGs but also with RAWs because editing RAW has its limits as well. It makes me feel helpless when I struggle with the sliders and buttons and my lack of vision while the time, the scarce commodity, flies by.
Of course, if your photo is properly exposed, the editing part should be easier. Yet a lot depends on the type of the photograph and the camera and lenses you use. I may not need to add that life is far from perfect. Sometimes you can’t influence the conditions under which you take the photographs, sometimes you don’t have the photo technique you would need or you simply make a mistake you need to correct.
What does help me is to edit my photos soon after they were taken. If I leave them in my archives for weeks, months and years, I forget much of what I felt when taking them and what exactly addressed me and thus I lose the vision I had. Of course, there are some general rules and procedures of how to edit a photograph but if it lacks a personal expression, there is something missing.
Editing doesn’t just mean moving sliders to get a technically well-processed image. Editing also means having a vision of what story the image is supposed to tell. Thus the art of taking photographs and editing their contents supports one another and leads to a more powerful result.
I named this post “Pleasures and pains of editing photographs” so where are the pleasures in all the struggles? I find them in finalising a photo in a proper way, in creating an interesting and well-looking image, in fulfilling my vision where the camera wasn’t quite able to capture it, in discovering new visions by means of the editing. Despite all the struggles (and the need to talk about them once in a while), the pleasures definitely outweigh the pains.


