Smiling
I learned very quickly last year – and see it even more now when participating in the Be still 52 course – that when you want to take arranged still life photos, you need quite a few things. Firstly those objects which are essential to your images – whether everyday objects or special ones and you may also need additional objects to complement the scene. But they are just a part of the whole and you may also need some suitable material or cloth to place underneath those objects, and often also behind, around or between, as appropriate. I found out this to be a problem for me so I decided to go and buy some to have something to start with. I bought a box of a nice floating board with wooden pattern which can serve as both the base and background, and a few pieces of cloth.

On Sunday I was practising composition, side lighting, aperture setting and distance of objects in the scene in relation to depth of field. I also tried to use a texture in post-processing and liked what I got when using just the first one I chose. I want to show both the textured and non-textured version to you so you can see the difference.
Here is the opening photo before applying the texture:
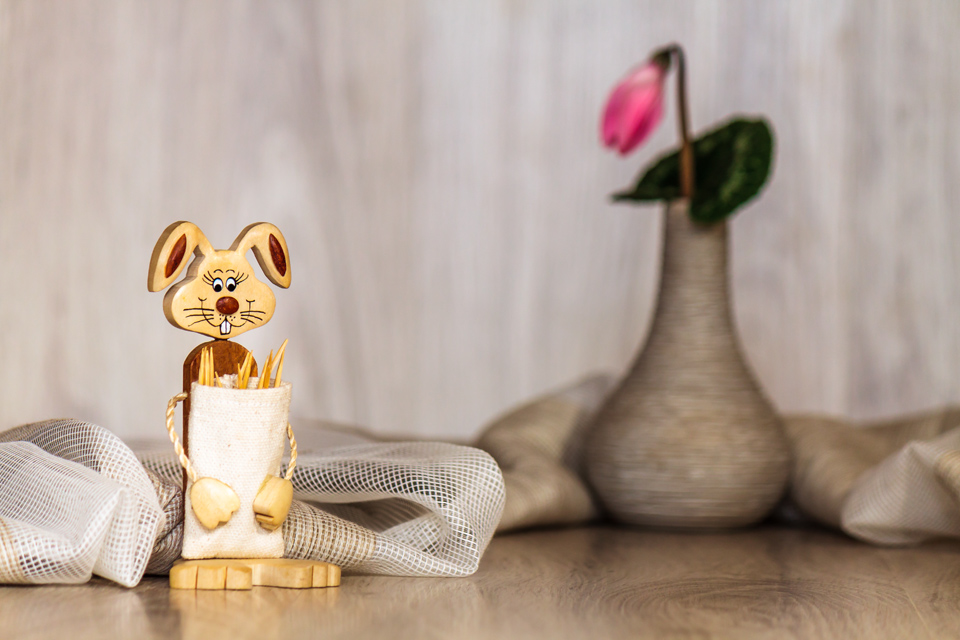
Quite a difference, right? I like them both…
I thought it might be interesting for you to get the details of how the photo and image were created so here is the behind-the-scenes view:
1) I used the new board as both the base and background and one of the new cloths to decorate the scene. It is interesting to see how the same board looks different when put into horizontal and vertical position thanks to different reflection of light. The surface of the floating board is a bit more reflective than I expected and I need to take that into account.
2) The board in the background was facing an eastern window in early afternoon light while the hare was lit from the left side by a lamp. I bought the lamp a few weeks ago to have it on my desk and I chose it because of its nice white light and darkening function – it enables three levels of brightness. I need to give the credit to my husband here for coming up with the great idea of using the lamp during the photographing as it proved to be really helpful. Far from professional means like an umbrella with diffused light but far better than a common bulb.
3) I took the photo in RAW format and processed it in Adobe Lightroom. I made just the basic adjustments, no split toning, colour shifts or curve haziness.
4) The version with the texture have added Kim Klassen’s texture kk_waterfront1_bestill which I applied with 69% opacity in multiply blending in Photoshop Elements. I removed the texture entirely from the vase, flower and figure and partly masked it on the cloth. It is interesting that although the texture was taken away from the vase and the flower, they blend into the background perfectly.
PS I loved the smile on the figure’s face so I decided to create a photo focused on that figure alone. Let’s say… a portrait… with selective focus and negative space for the photo to breathe:
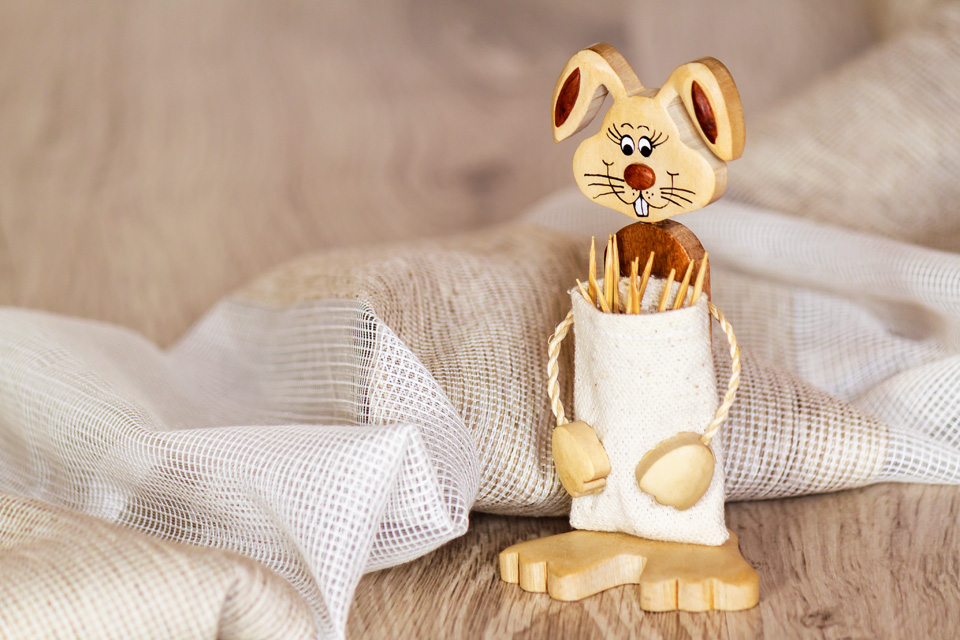
Makes me smile too.


You May Also Like
52-week photoproject – Week 25
52-week photoproject – Week 13
